인터넷 환경에서 수많은 정보를 손쉽게 주고 받기 위해 제공된 정보공간
- 하이퍼텍스트 방식을 통해 정보를 연결함

인터넷 환경에서 수많은 정보를 손쉽게 주고 받기 위해 제공된 정보공간

HTML은 하이퍼텍스트 마크업 언어(HyperText Markup Language)라는 의미의 웹 페이지를 위한 지배적인 마크업 언어다.
간단한 HTML 문서 예제
<html>
    <meta charset="utf-8">
    <head>
        <title> Introduction to IoT </title>
    </head>
    <body>
        <h1> 강의자료 </h1>
        <ul>
            <li><a href="https://kwanulee.github.io/iot/docs/internet/internet.html">
              컴퓨터 네트워크, 인터넷, 아두이노</a></li>
            <li><a href="https://kwanulee.github.io/iot/docs/internet/wifi.html">
              웹과 아두이노</a></li>
        </ul>
    </body>
</html>작동 방식
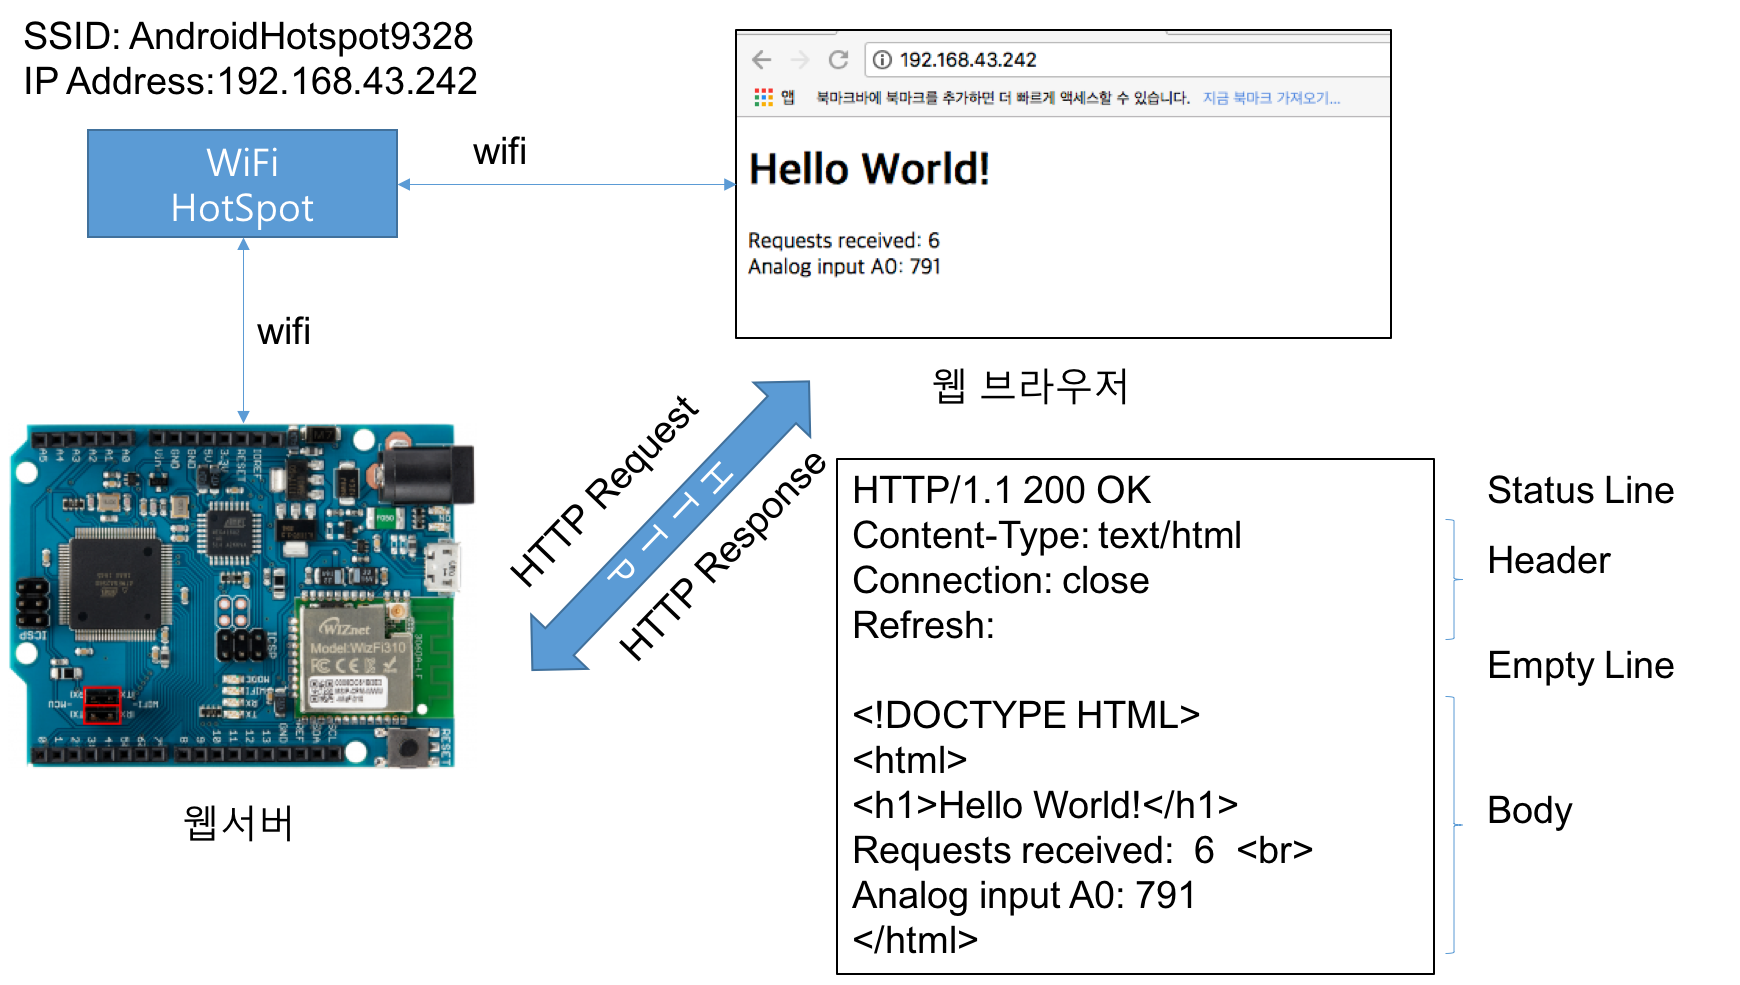
웹 브라우져는 웹 서버와 접속이 확립되면 다음과 같은 항목으로 구성된 요청을 보낸다.
예제
GET / HTTP/1.1\r\n
HOST: arduino.cc
CONNECTION: close\r\n
\r\n웹 서버는 웹 브라우저로부터 요구를 받은 뒤, 다음과 같은 항목으로 구성된 응답을 돌려준다.
예제
HTTP/1.1 200 OK
Server: nginx/1.4.2
Date: Fri, 25 May 2018 10:22:26 GMT
Content-Type: text/plain
Content-Length: 2263
Last-Modified: Wed, 02 Oct 2013 13:46:47 GMT
Connection: close
Vary: Accept-Encoding
ETag: "524c23c7-8d7"
Accept-Ranges: bytes
\r\n
아두이노 IDE의 [파일]-[예제]-[WizFi310]-[WebServer] 선택
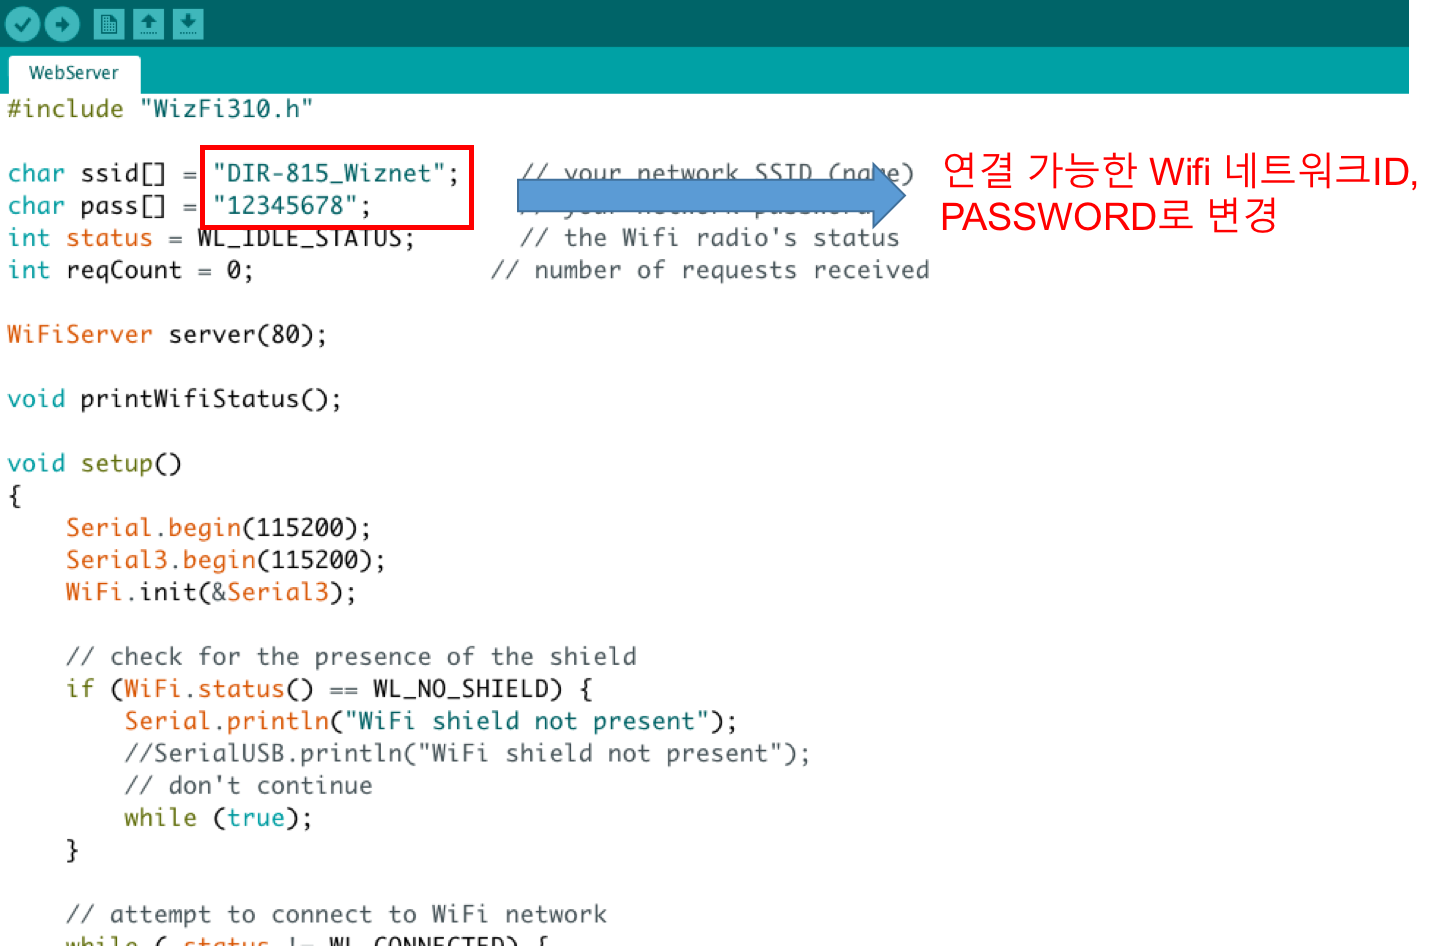
WiFi 네트워크 설정
하드웨어 구성

WizArduino MEGA WiFi 보드를 mini-USB (5pin)으로 PC와 연결 후, 업로드
Arduino/Genuino Mega or Mega 2560선택 해야함
시리얼 모니터 창에서 웹서버 주소 확인하기
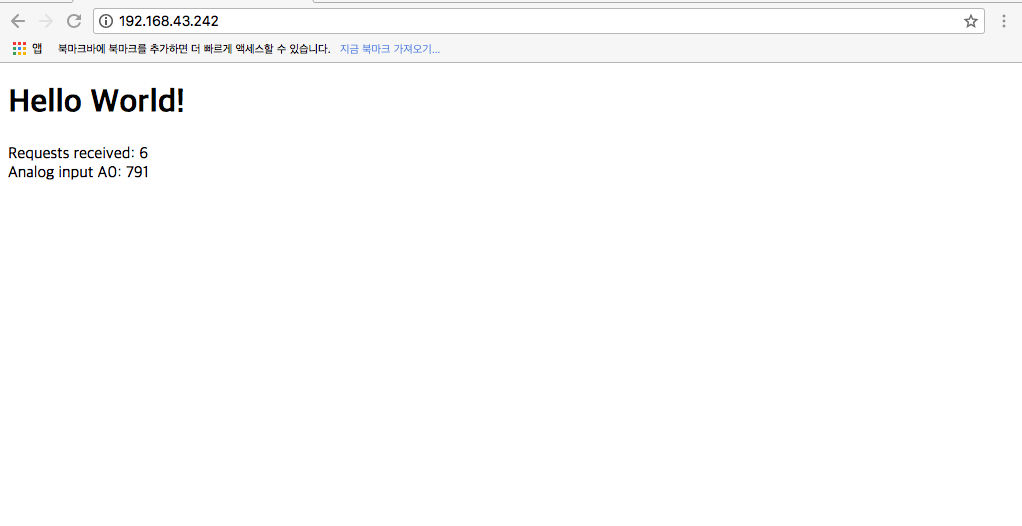
웹 브라우저의 주소창에 시리얼모니터에서 확인한 아두이노 보드로 만든 서버의 IP주소를 입력한다.
WiFiServer server(80);      // 80포트의 웹서버를 위한 변수 선언

void setup() {
    ...
    server.begin();         // 웹서버 시작
}

void loop() {
  // 웹서버로 클라이언트 요청이 들어오면, 이 클라이언트의 요청을 처리할 웹서버 대리인 (client) 반환
  WiFiClient client = server.available();

  if (client) {
    Serial.println("New client");
    boolean currentLineIsBlank = true; // 변수 초기화

    while (client.connected()) {
        if (client.available()) {
        char c = client.read();
        Serial.write(c);

    // 빈 줄을 읽었다면, HTTP request의 끝을 나타내므로, HTTP response를 보냄
    if (c == '\n' && currentLineIsBlank) {
            Serial.println("Sending response");

            // send a standard http response header
            // use \r\n instead of many println statements to speedup data send
            client.print(
            "HTTP/1.1 200 OK\r\n"
            "Content-Type: text/html\r\n"
            "Connection: close\r\n"  // the connection will be closed after completion of the response
            "Refresh: 20\r\n"        // refresh the page automatically every 20 sec
            "\r\n");
            client.print("<!DOCTYPE HTML>\r\n");
            client.print("<html>\r\n");
            client.print("<h1>Hello World!</h1>\r\n");
            client.print("Requests received: ");
            client.print(++reqCount);
            client.print("<br>\r\n");
            client.print("Analog input A0: ");
            client.print(analogRead(0));
            client.print("<br>\r\n");
            client.print("</html>\r\n");
            break;
        }
        if (c == '\n') {
            // you're starting a new line
            currentLineIsBlank = true;
        }
        else if (c != '\r') {
            // you've gotten a character on the current line
            currentLineIsBlank = false;
        }
      }
    }
    // give the web browser time to receive the data
    delay(10);

    // close the connection:
    client.stop();
    server.closeAllClientSocket();
    Serial.println("Client disconnected");
  }
}
하드웨어 구성

2.1 아날로그 입력 값 출력하기 예제를 수정
void setup()
{
    ...
    pinMode(9,OUTPUT);    //  LED 연결을 위한 추가
}void loop()
{
// listen for incoming clients
WiFiClient client = server.available();
if (client) {
Serial.println("New client");
// an http request ends with a blank line
boolean currentLineIsBlank = true;
String currentLine = ""; // http 요청 빈 라인 검사용 변수
while (client.connected()) {
if (client.available()) {
char c = client.read(); // 데이터가 있으면 읽어서 저장
Serial.write(c);
// if you've gotten to the end of the line (received a newline
// character) and the line is blank, the http request has ended,
// so you can send a reply
if (c == '\n' && currentLineIsBlank) {
Serial.println("Sending response");
// send a standard http response header
// use \r\n instead of many println statements to speedup data send
client.print(
"HTTP/1.1 200 OK\r\n"
"Content-Type: text/html\r\n"
"Connection: close\r\n" // the connection will be closed after completion of the response
"\r\n");
client.print("<!DOCTYPE HTML>\r\n");
client.print("<html>\r\n");
client.println( );
client.print("Click <a href=\"/H\"> here </a> turn the LED on pin 9 on <br>");
client.print("Click <a href=\"/L\"> here </a> turn the LED on pin 9 off <br>");
client.println( );
client.print("</html>\r\n");
break;
}
if (c == '\n') {
// you're starting a new line
currentLineIsBlank = true;
currentLine = "";
}
else if (c != '\r') {
// you've gotten a character on the current line
currentLineIsBlank = false;
currentLine += c ; // currentLine에 읽어들인 문자를 추가
}
// currentLine의 끝이 GET /H로 끝나는지 검사
if (currentLine.endsWith("GET /H")) {
digitalWrite(9, HIGH);
}
if (currentLine.endsWith("GET /L")) {
digitalWrite(9, LOW);
}
}
}
// give the web browser time to receive the data
delay(10);
// close the connection:
client.stop();
server.closeAllClientSocket();
Serial.println("Client disconnected");
}
}시리얼 모니터 창에서 웹서버 주소 확인하기
웹 브라우저의 주소창에 시리얼모니터에서 확인한 아두이노 보드로 만든 서버의 IP주소를 입력한다.
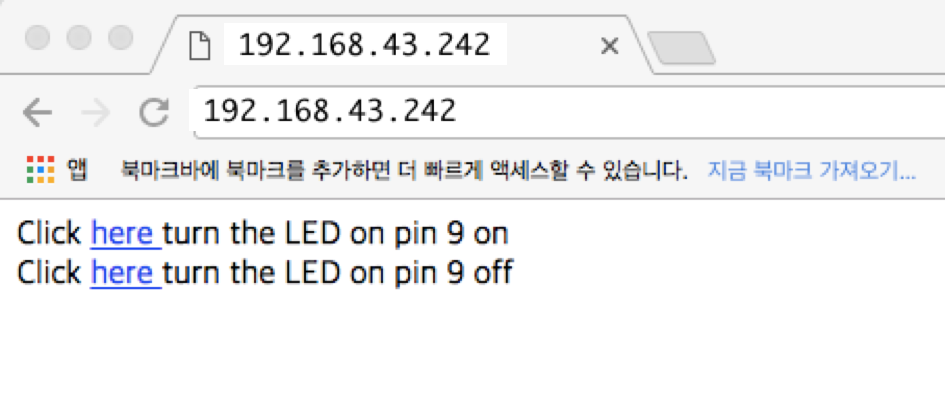
링크를 클릭하여 LED 불이 켜지고 꺼지는 것을 확인
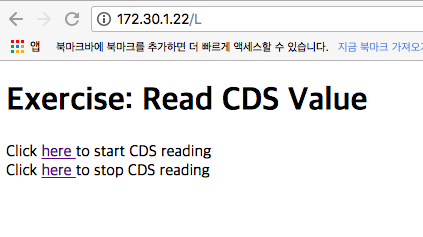
결과 화면
웹브라우저에 웹서버 주소를 입력한 상태
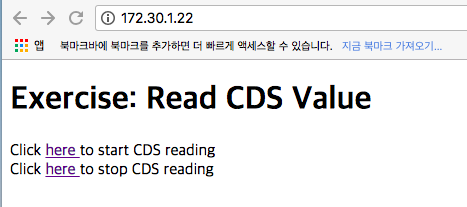
CDS reading을 시작하는 링크를 누른경우
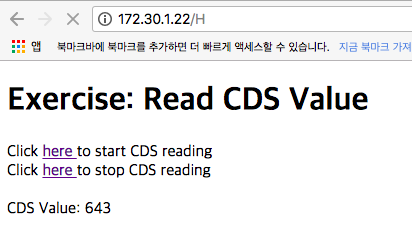
CDS reading을 중지하는 링크를 누른경우
