APIGateway
2. 디바이스 상태 조회 REST API 구축하기
다음과 같은 API 요청과 API 응답을 가지는 REST API를 Lambda 함수와 API Gateway를 이용하여 구축해본다.
-
API 요청
GET /devices/{device} -
응답 모델
-
  {
      "state": {
          "desired": {
              "attribute1": integer2,
              "attribute2": "string2",
              ...
              "attributeN": boolean2
          },
          "reported": {
              "attribute1": integer1,
              "attribute2": "string1",
              ...
              "attributeN": boolean1
          },
          "delta": {
              "attribute3": integerX,
              "attribute5": "stringY"
          }
      },
      "metadata": {
          "desired": {
              "attribute1": {
                  "timestamp": timestamp
              },
              "attribute2": {
                  "timestamp": timestamp
              },
              ...
              "attributeN": {
                  "timestamp": timestamp
              }
          },
          "reported": {
              "attribute1": {
                  "timestamp": timestamp
              },
              "attribute2": {
                  "timestamp": timestamp
              },
              ...
              "attributeN": {
                  "timestamp": timestamp
              }
          }
      },
      "timestamp": timestamp,
      "clientToken": "token",
      "version": version
  }
-
–
단계1: AWS Toolkit을 통해 Lambda 함수 생성
- 다음 정보를 바탕으로 AWS Lambda 프로젝트를 JetBrains용 AWS Toolkit을 이용하여 생성한다.
- Project name: GetDeviceLambda
- Rumtime:java11 - SDK: 11버전의 SDK를 선택하거나 없으면 다운로드한 후 선택
-
생성된 * GetDeviceLambda*의 build.gradle 파일을 열고, 다음 의존성을 추가하고, 변경사항을 반영합니다.
dependencies { ... implementation platform('com.amazonaws:aws-java-sdk-bom:1.12.529') implementation 'com.amazonaws:aws-java-sdk-iot' ... } -
src/main/java/helloworld/App.java 파일을 다음 코드로 바꿉니다.
package helloworld; import com.amazonaws.services.iotdata.AWSIotData; import com.amazonaws.services.iotdata.AWSIotDataClientBuilder; import com.amazonaws.services.iotdata.model.GetThingShadowRequest; import com.amazonaws.services.lambda.runtime.Context; import com.amazonaws.services.lambda.runtime.RequestHandler; /** * Handler for requests to Lambda function. */ public class App implements RequestHandler<Event, String> { public String handleRequest(final Event event, final Context context) { AWSIotData iotData = AWSIotDataClientBuilder.standard().build(); GetThingShadowRequest getThingShadowRequest = new GetThingShadowRequest() .withThingName(event.device); String output = new String( iotData.getThingShadow(getThingShadowRequest).getPayload().array()); return output; } } class Event { public String device; } - src/test/java/helloworld/AppTest.java 파일의 코드를 주석 처리한다.
–
단계2: Lambda 함수의 로컬 테스트
작성된 Lambda함수가 정상적으로 동작하는 지를 테스트해 보기 위해서 다음 절차를 수행합니다.
- [필수] Docker 프로세스가 실행된 상태이어야 함
-
IntelliJ IDEA IDE의 화면 상단 타이틀 바에서 “[Local] HelloWorldFunction” 옆의 연두색 실행 버튼 (삼각형)을 클릭
-
[Edit Configuration] 다이얼로그 화면에서 Text – Event Templates – 부분의 드롭다운 메뉴 중에서 API Gateway AWS Proxy를 선택하고, 다음 입력 문자열을 입력한다.
-
조회할 사물의 이름이 MyMKRWiFi1010인 경우를 가정
  {
      "device" : "MyMKRWiFi1010"
  }
-
- Run 클릭
-
Console 창에 다음과 같은 형식의 메시지가 마지막에 출력되는 지 확인합니다. (본인의 aws 계정에 생성된 사물의 상태가 Json 형식으로 반환됨)
...
SSTART RequestId: e49a9f7e-bf5d-415a-b72d-9e5754830e79 Version: $LATEST
Picked up JAVA_TOOL_OPTIONS: -XX:+TieredCompilation -XX:TieredStopAtLevel=1
END RequestId: e49a9f7e-bf5d-415a-b72d-9e5754830e79
REPORT RequestId: e49a9f7e-bf5d-415a-b72d-9e5754830e79	Init Duration: 0.82 ms	Duration: 12795.96 ms	Billed Duration: 12796 ms	Memory Size: 512 MB	Max Memory Used: 512 MB
"{\"state\":{\"desired\":{\"welcome\":\"aws-iot\"},\"reported\":{\"temperature\":\"22.30\",\"LED\":\"OFF\",\"welcome\":\"aws-iot\"}},\"metadata\":{\"desired\":{\"welcome\":{\"timestamp\":1697592894}},\"reported\":{\"temperature\":{\"timestamp\":1697772333},\"LED\":{\"timestamp\":1697772333},\"welcome\":{\"timestamp\":1697592894}}},\"version\":1117,\"timestamp\":1699062480}"
–
단계3: Lambda 함수의 배포
-
GetDeviceLambda 프로젝트 탐색창에서 template.yaml을 찾아서 선택하고, 선택된 상태에서 오른쪽 마우스 클릭하여 SyncServerless Application (formerly Deploy) 메뉴를 선택
-
[Confirm development stack] 다이얼로그 화면에서 Confirm 선택
-
[SyncServerless Application (formerly Deploy)] 다이얼로그 화면에서, Create Stack에 적절한 이름(예, GetDeviceLambda)을 입력 하고, S3 Bucket 중에 하나를 선택(S3 Bucket이 없으면 Create 버튼을 눌러 생성 후 선택)하고, CloudFormation Capabilities: 에서 IAM 체크박스를 선택한 후, Sync 클릭
- [참고] 한참 동안 진행이 안되면 현재 스텝을 한번더 수행해 본다.
-
콘솔 창에 다음 결과가 맨 마지막 줄에 출력되는 지를 확인
...
Stack creation succeeded. Sync infra completed.


Process finished with exit code 0
–
단계4: Lambda 함수의 원격 테스트
-
-
AWS Lambda함수가 다른 AWS 서비스 (예, DynamoDB)를 사용하기 위해서는 필요한 권한이 Lambda함수에 연결된 실행 역할 정책(Execution Role Polcity)에 포함되어 있어야 합니다.
- 실행 역할 정책 (Execution Role Polcity)은 Lambda 함수가 실행되는 동안에만 사용되며, AWS Identity and Access Management (IAM) 역할과 연관됩니다. 가령, Lambda 함수가 IoT의 사물 목록을 조회할 권한이 필요한 경우, 실행 역할 정책은 AWSIoTDataAcess 권한을 가진 정책이 연결되어 있어야 합니다.
-
람다함수의 실행 역할 정책 업데이트
- AWS Lambda 콘솔에서 함수 페이지를 연다.
- 나열된 함수 목록 중에서 GetDeviceLambda-… 함수를 선택한다.
- 구성 탭에서 권한 메뉴를 선택하면, 실행역할을 찾을 수 있다.
- 역할 이름을 클릭하면, 권한 정책 파트에서 해당 역할에 설정된 정책들을 확인할 수 있다.
- 만약, 권한정책에 AWSIoTFullAccess 정책이 포함되어 있지 않다면, 권한 추가»정책연결 메뉴를 클릭하여 AWSIoTFullAccess 정책을 검색하고 선택한다음 권한추가 버튼을 클릭한다.
- AWS Lambda 콘솔에서 함수 페이지를 연다.
-
원격 테스트를 위해서 AWS Toolkit 창의 탐색기에서 Lambda를 확장하여 GetDeviceLambda-HelloWorldFunction-XXX선택하고, 오른쪽 마우스 클릭하여 Run ‘[Remote] HelloServer…‘메뉴를 선택
- 로컬 테스트에서 사용했던 동일한 입력 값으로 테스트를 진행하고, 동일한 결과가 나오는지를 확인한다.
–
단계5 API Gateway 콘솔에서 REST API 생성
- API Gateway 콘솔로 이동합니다.
- 이전에 생성한 my-device-api를 선택합니다.
- 리소스 이름(/devices)을 선택한 후, 리소스 생성을 클릭합니다.
- 리소스 이름에 {device}를 입력합니다.
- /{device}는 경로 매개변수(Path Parameter)를 나타내며, 이는 특정 디바이스의 고유 식별자(Unique Identifier)를 의미합니다. 여기서 /{device}는 실제 요청 시 서버가 처리할 특정 디바이스를 지정하는 데 사용되는 변수입니다.
- {device}를 선택한 상태에서, 메서드 섹션에서 메소드 생성을 클릭합니다.
- 메서드 유형 드롭다운 메뉴에서 GET을 선택합니다.
- 통합 유형에서 Lambda 함수를 선택합니다.
- Lambda 프록시 통합은 선택안된 상태를 유지합니다.
- Lambda 함수에서 Lambda 함수를 생성한 리전을 선택한 후 드롭다운 메뉴에서 GetDeviceLambda-HelloWorldFunction을 선택합니다. 메서드 생성을 클릭합니다.
- 통합요청을 선택하여, 클라이언트가 제공하는 HTTP Request를 Lambda 함수가 인식하는 형식으로 변환합니다.
- [편집]]을 클릭하고, 화면의 하단의 매핑 탬플릿을 확장하여 매핑 템플릿 추가를 클릭한다.
- 콘텐츠 유형 드롭다운 메뉴에서 application/json을 입력
-
탬플릿 생성 드롭다운 메뉴에서 메서드 요청 패스스루를 선택하고, 템플릿 본문에 다음을 입력합니다.
 {
     "device": "$input.params('device')"
 }
이는 Lambda 함수에 전달될 payload를 구성하는 템플릿으로서, “device” 속성 값을 /{device} 경로변수의 값으로 사용하겠다는 의미입니다.
- 탬플릿 생성을 선택합니다.
- /devices/{device} – GET – 메소드 실행 창으로 이동하여, 테스트 탭을 클릭합니다.
- device 경로에 본인이 만든 사물 이름(예, MyMKRWiFi1010)을 입력합니다.
-
테스트를 클릭하고, 다음과 같은 결과가 나오는 지 확인합니다.
/devices/{device} - GET 메서드 테스트 결과
...
응답 본문
"{\"state\":{\"desired\":{\"welcome\":\"aws-iot\",\"temperature\":\"25.1\",\"LED\":\"OFF\"},\"reported\":{\"temperature\":\"24.50\",\"LED\":\"OFF\",\"welcome\":\"aws-iot\"},\"delta\":{\"temperature\":\"25.1\"}},\"metadata\":{\"desired\":{\"welcome\":{\"timestamp\":1697592894},\"temperature\":{\"timestamp\":1699157194},\"LED\":{\"timestamp\":1699157194}},\"reported\":{\"temperature\":{\"timestamp\":1699158494},\"LED\":{\"timestamp\":1699158494},\"welcome\":{\"timestamp\":1697592894}}},\"version\":1145,\"timestamp\":1700158284}"
...
–
단계6: CORS 활성화 및 API Gateway 콘솔에서 REST API 배포
JavaScript는 Cross-Origin Resource Sharing (CORS) 요청을 기본적으로 제한합니다. 즉, JavaScript 코드가 동일 서버 내의 리소스를 접근하는 것은 허용하지만, 다른 서버의 리소스를 사용하고자 하는 경우에는 CORS 헤더 정보가 포함되어 있어야 합니다.
- 더 자세한 정보는 https://developer.mozilla.org/ko/docs/Web/HTTP/Access_control_CORS 참조
REST API 리소스에 대해 CORS 지원 활성화
- 리소스에서 /devices/{device}를 선택하고, CORS 활성화를 클릭합니다.
- 게이트웨이 응답과 Access-Control-Allow-Methods의 모든 체크박스를 선택합니다.
- 저장를 선택합니다.
지금까지 API를 생성했지만 아직 실제로 사용할 수는 없습니다. 배포해야 하기 때문입니다.
- 화면 상단의 API베포 버튼을 클릭합니다.
- 배포 스테이지 드롭다운 메뉴에서 이전에 생성한 prod를 선택합니다.
- 배포을 클릭합니다.
- URL 호출 에 표시된 URL을 복사합니다.
–
단계7: REST API 테스트
- prod 스테이지 편집기의 맨 위에 있는 호출 URL을 적어 둡니다.
- 웹 브라우저 주소창에 “호출 URL/devices/MyMKRWiFi1010”을 입력한 후 엔터를 쳐 봅니다.
- 앞에서 정의한 응답모델과 동일한 형식의 JSon 문자열이 반환된 것을 확인할 수 있습니다.
단계8: REST API 활용한 JavaScript 기반 웹 프로그래밍
- 나의 디바이스 조회
-
get_device_state.html 시작 html 페이지
<!DOCTYPE html> <html lang="en"> <head> <meta charset="UTF-8"> <title>AWS Open API Sample</title> <!-- JQuery 라이브러리 설정 --> <script src="https://code.jquery.com/jquery-3.4.1.min.js" integrity="sha256-CSXorXvZcTkaix6Yvo6HppcZGetbYMGWSFlBw8HfCJo=" crossorigin="anonymous"></script> <!-- 디바이스 조회 자바스크립트 로딩--> <script src="device_state.js"></script> </head> <body> <h3>My AWS API Sample</h3> <input type="button" value="조회 시작" onclick="Start();" /> <input type="button" value="조회 중지" onclick="Stop();" /> <h4>나의 디바이스 최신 상태</h4> <div id="result">No Data</div> </body> </html> -
device_state.js: JQuery 기반 Javascript 코드
  // 중지를 위해 ID 보관
  var intervalId = null;

  // API 시작
  function Start() {
      invokeAPI();
      intervalId = setInterval(invokeAPI, 1000);
      document.getElementById("result").innerHTML="조회 중...";
  }
  // API 중지

  function Stop() {
      if(intervalId != null) {
          clearInterval(intervalId);
          document.getElementById("result").innerHTML="No Data";
      }
  }

  var invokeAPI = function() {
      // 디바이스 조회 URI
      // prod 스테이지 편집기의 맨 위에 있는 "호출 URL/devices"로 대체해야 함
      var API_URI = 'https://XXXXXXXXXX.execute-api.ap-northeast-2.amazonaws.com/prod/devices/MyMKRWiFi1010';
      $.ajax(API_URI, {
          method: 'GET',
          contentType: "application/json",

          success: function (data, status, xhr) {
                  var result = JSON.parse(data);
                  printData(result);  // 성공시, 데이터 출력을 위한 함수 호출

                  console.log("data="+data);
          },
          error: function(xhr,status,e){
                  alert("error");
          }
      });
  };


  // 데이터 출력을 위한 함수
  var printData = function(result){
      document.getElementById("result").innerHTML = "temp: "+ result.state.reported.temperature +
                                                  ", LED: " + result.state.reported.LED;
  }
-
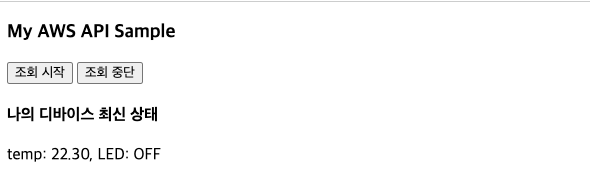
- 실행 화면
-
초기화면

-
조회 버튼을 클릭한 후
-